Navigating the registration process for agencies like OTS, CTS, UTS, and others can be daunting, especially if you’re doing it for the first time. It’s not just about filling in a few forms — you’ll need to be thorough from the moment you identify the right agency to when you receive your test confirmation. The process kicks off by confirming which agency is relevant to your exam or job requirement. This might seem straightforward, but many applicants trip up by misreading job ads or falling for unofficial websites.
That first step of figuring out whether you’re dealing with OTS, CTS, UTS, or another agency is foundational. Once you’re sure of the agency, you’ll also need to review its eligibility criteria, syllabus, and deadlines. Every agency has slightly different requirements, and failing to align yourself with these can derail your application before you’ve even begun.
Once you’ve got your agency pinned down, the next stretch involves preparation and precision. You’ll need to gather several key documents, from your CNIC or passport to academic certificates, digital photos, and proof of payment, and make sure each one meets strict format and clarity standards. During the online application, accuracy is everything. Your name, ID number, and academic details need to match your official records exactly. Even a small error here can lead to disqualification or delay.
You’ll also be setting up an account, selecting the right test, and uploading files, all through the agency’s website. That’s where many applicants run into trouble, whether it’s uploading the wrong document, choosing the wrong test, or skipping over important eligibility checks. At every stage, you’re required to double-check your details, follow the instructions precisely, and keep a close eye on deadlines. The system isn’t very forgiving of careless errors.
After completing the form and making the payment, the final stage is all about confirmation and preparation. Submitting your application doesn’t mean you’re done, you need to monitor your email and the agency’s website for updates, download your admit card, and keep your registration proof safe. A lot can still go wrong here. Confirmation emails might not arrive, test centers might change last minute, or you might lose your registration number. Staying organized and proactive is key.
Print everything. Keep digital backups. Check for updates regularly. With so many small but crucial steps, this process rewards those who stay attentive and prepared. From the first click to test day, it’s less about speed and more about consistency and detail. If you follow each step carefully and know what to expect at each turn, you’ll be setting yourself up for a smooth registration experience and one less thing to worry about on the path to your exam or job.
Step 1: Identify the Correct Testing Agency and Understand Its Purpose
Before you begin the registration process, it’s essential to know which testing agency you need to register with based on your exam or recruitment requirement. Each agency serves different purposes and sectors:
- OTS (Overseas Testing Service): Primarily used for recruitment tests for government and private sector jobs, especially for overseas or specialized positions. OTS offers services like recruitment, research, and admissions.
- CTS (Central Testing Service): Mainly used for certification exams in technical and professional fields, including AVIXA certifications, and often linked with InfoComm.
- UTS (Universal Testing Services): Provides testing services for educational assessments and recruitment tests across Pakistan with a focus on merit-based recruitment.
- Other Agencies: May include regional or specialized testing bodies depending on the job or educational institution.
How to identify your agency:
- Check the official job advertisement, recruitment notice, or educational institution’s requirements.
- Confirm the agency’s official website and contact information.
- Understand the test type, syllabus, and eligibility criteria specific to the agency.
Step 2: Gather All Required Documents and Information
Before starting your online registration, prepare the following essential documents and details:
- Valid Identification: CNIC (Computerized National Identity Card) for Pakistani nationals or a valid passport for foreigners.
- Personal Information: Full name (as per ID), father’s name, date of birth, gender, and contact details (phone number and email).
- Educational Certificates: Scanned copies of your academic degrees, diplomas, or certificates as required.
- Photographs: Recent passport-sized photographs in digital format (usually JPG or PNG), meeting the size and background requirements specified by the agency.
- Payment Method: Credit/debit card, bank challan, or online payment account details for paying the registration fee.
- Additional Documents: Some tests may require experience certificates, domicile certificates, or other supporting documents.
Tips:
- Keep scanned copies clear and legible.
- Ensure your email and phone number are active and accessible for communication.
- Review the agency’s document upload guidelines carefully to avoid rejection.
Step 3: Access the Official Website of the Testing Agency
Always use the official website to avoid scams or fake registrations. Here are the common official websites:
- OTS: https://ots.org.pk
- CTS: Usually https://cts.org.pk or the specific certification body’s site (e.g., InfoComm for CTS-I)
- UTS: https://uts.com.pk
- For other agencies, verify the official portal through trusted sources or official announcements.
Steps to access:
- Open a reliable browser.
- Type the official URL carefully or search for the agency name plus “official site.”
- Avoid clicking on pop-up ads or third-party sites claiming to offer registration.
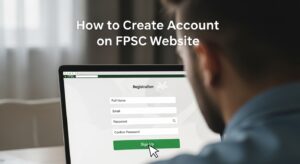
Step 4: Create an Online Account (If Required)
Most agencies require you to create an account before applying:
- Look for buttons labeled “Register,” “Sign Up,” or “Create Account.”
- Enter your basic information such as full name, CNIC/passport number, email, and phone number.
- Choose a secure password and confirm it.
- Submit the form.
- Verify your email or phone number by entering the OTP (One-Time Password) sent to you.
- Log in with your new credentials.
Important:
- Use a valid email address you check regularly.
- Save your username and password securely.
- If you forget your password, use the “Forgot Password” link for recovery.
Step 5: Select the Appropriate Test or Recruitment Drive
Once logged in:
- Navigate to the “Available Tests,” “Apply Now,” or “Recruitment” section.
- Carefully read the test descriptions, eligibility criteria, and instructions.
- Select the test or post you wish to apply for.
- Some agencies provide filters by date, location, or job category to help you find the correct test.
Before proceeding:
- Confirm you meet all eligibility requirements (age, education, experience).
- Note the application deadlines and test dates.
- Check if multiple attempts or reapplications are allowed.
Step 6: Complete the Application Form with Precision
Fill out the application form carefully:
- Enter your personal details exactly as they appear on your CNIC or passport.
- Provide educational qualifications with accurate dates and institution names.
- Select your preferred test center or location from the available options.
- Upload scanned documents and photographs according to the agency’s specifications.
- Double-check all fields for completeness and accuracy.
Common pitfalls to avoid:
- Mismatched names or dates.
- Uploading incorrect or blurry documents.
- Missing mandatory fields.
Step 7: Pay the Registration Fee
Most agencies require a fee to process your application:
- Check the fee amount on the official site.
- Choose your payment method: online payment (credit/debit card), bank challan, or mobile payment.
- Follow payment instructions carefully.
- Save or print the payment receipt or confirmation number.
Important:
- Payment must be completed before submission.
- Keep the receipt safe as proof of payment.
- Some agencies may reject applications without valid payment confirmation.
Step 8: Submit Your Application and Confirm Registration
- Review your entire application one last time.
- Click the “Submit” button.
- Wait for the confirmation message or email.
- Note down your registration or roll number.
- Download and print your registration slip or admit card.
What to expect:
- Confirmation via email or SMS.
- Details about test date, time, and venue.
- Instructions for the test day.
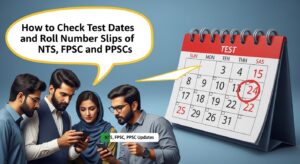
Step 9: Prepare for the Test and Monitor Updates
- Regularly check your email and the agency’s website for any updates or announcements.
- Download any study materials or guidelines provided.
- Plan your travel and logistics for the test day.
- Arrive at the test center early with your admit card and valid ID.
Common Issues and How to Troubleshoot Them Effectively
| Step | Troubleshooting |
|---|---|
Step 1 Issues: Identifying the Correct Agency
|
|
Step 2 Issues: Document Preparation
|
|
Step 3 Issues: Website Access
|
|
Step 4 Issues: Account Creation
|
|
Step 5 Issues: Test Selection
|
|
Step 6 Issues: Application Form Completion
|
|
Step 7 Issues: Payment
|
|
Step 8 Issues: Submission and Confirmation
|
|
Step 9 Issues: Test Day Preparation and Updates
|
|
Final Tips for a Smooth Registration Experience
- Start the registration process well before the deadline.
- Keep all documents and information handy.
- Follow instructions on the official website meticulously.
- Use official communication channels for queries.
- Keep calm and patient, especially during peak registration periods.